Tired of achy, tight shoulders and upper back?
If yes, this post is for you.
Melting away tension in your shoulders and upper back doesn’t have to be difficult or time consuming. You just need a few minutes and a couple of simple props, and you can reverse the effects of a day spent in front of the computer or breastfeeding your baby more effectively than by booking a massage (do book a massage too though if you can – it’s awesome in so many ways, but remember you can be your own massage therapist whenever you need it).
What I’m about to introduce you to is called self myofascial release. These practices are invaluable if you have a tendency to have tight areas in your body. Today we’ll be focusing on your shoulders.
You’ll be needing:

SCAPULA RELEASE
Place the ball on the inner side of your shoulder blade, between the shoulder blade and the spine.
If you’re a beginner, lean against the wall and slightly round your back to access deeper muscles and fascia under your scapula.
Move up and down as you take deep breaths and massage the area. Be mindful of not pressing your myofascial release balls against the bone, but target the muscles and connective tissue/fascia instead.
This may feel intense, but when you’re doing it correctly, it also offers a pleasant feeling of release.
Make sure you’re not pushing through the pain. Intensity is ok, but pain means that you’re being too violent. Just be patient and do this for a few minutes on a regular basis, and you will feel the difference.
2. SCAPULA RELEASE 2
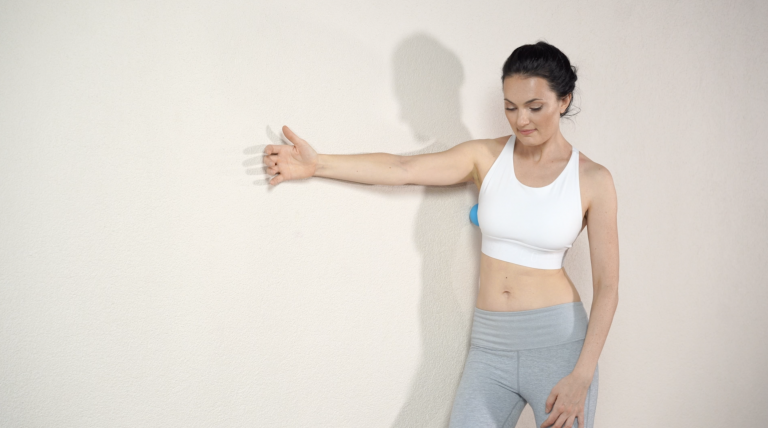
For this exercise, you’ll be placing the ball a few cm under your armpit (bra strap line on your side body).
If you’re not exactly sure where the ball is supposed to be, experiment with ball placement until you find the spot that feels a bit sore (remember, “a bit sore“ is not the same as “excruciating pain“).
Extend your arm in front of you as shown on the photo, and move up and down, massaging the area around the lower scapula. Then, rock the torso and move a bit towards the wall and away from the wall along a horizontal line. Breathe deeply.
When you’re done, release and take a moment to rest.


3. SHOULDER MOBILITY STRETCH
This stretch is awesome for less-than-mobile shoulders and upper back.
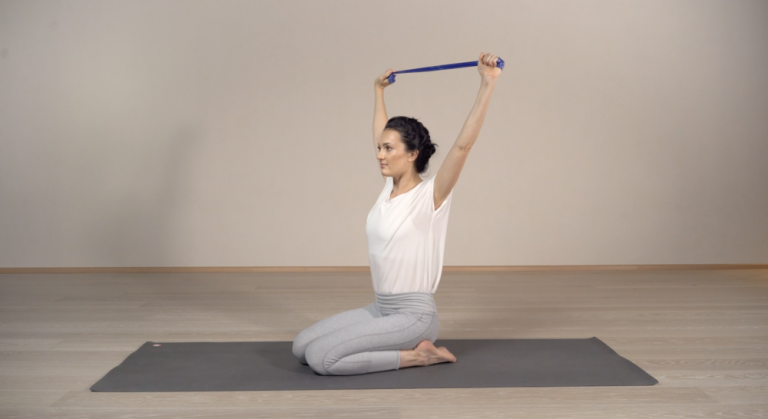
Hold on to the ends of a resistance band or a strap is such a way that you can move the arms from the front (resting them in your lap) to the back (resting them behind the back).
If it’s too easy, your strap or resistance band is too loose. Bring the hands closer and actively stretch your prop as you move your arms back and forth.
If it’s too hard, your strap or resistance band is too tight. Loosen it a bit by stepping your hands wider apart, and try again.
Lastly, lift your arms up like I do on this picture, steady the heads of your arm bones in the shoulder sockets and stretch your torso from side to side. It should feel pretty amazing, if not while you do it, then definitely afterwards.
Our side bodies tend to get extremely tight, so you’re doing your body a great favour by bringing more space to the intercostal muscles and giving your lungs more space to breathe.
THE MOST IMPORTANT PART
…is to actually get off your chair and do it! So don’t just look at the pictures of me demonstrating the exercises, but take action. I believe in you and your shoulders!
And if you need a proper demo in a video form, join me for a free mini-course that will introduce you to a few basic myofascial release exercises and stretches that will help you get started. Sign up below and I’ll see you inside.